

Yesterday I shared the story of helping my friend Bill identify his birth mother. The technique that got me there was to create a Master Match Tree that contained all of his DNA matches, through 3rd cousin, in one tree. There are some special quirks to how I do it, so I broke down the steps for you.
Based on the questions that flooded my way yesterday, I have been quite detailed in this post. For those of you who may be familiar with some of the steps and want to skip through, there are five parts and a conclusion, each part has a large subtitle to help you navigate more quickly.
One more important thing to note is this – I am not a DNA expert. I’m just a genealogist who is learning and incorporating DNA into my research efforts. Over the last two years, I have had some AMAZING experiences with DNA. Helping Bill identify his birth mother, and then applying what I learned from that process to my own DNA matches has helped me make some awesome progress with my own brick wall. I have enjoyed sharing this story. Please, know that I am well aware of the fact that I still have lots to learn. And for those of you who read yesterday’s post and called me an expert, I’m probably just a bit further on the DNA learning path than you and I’m happy to share what I’ve learned and hope it will help you learn and progress a bit.
Here goes!
Step One – Create the Tree
After choosing the option to create a new tree from scratch, I click on “Add new person”:

I enter my own name – or the name of the adoptee/focus person – AND choose “I am starting with myself”. The home person should be the focus person of the research problem.

To start an Ancestry tree, you need a second person. For an adoptee, you can add a place-holder parent with no name or a spouse. For Bill, I added his wife. In my example I am going to click on “Add Spouse”:

Then enter the spouse’s name. In my case, I’ll just type “Husband”:

After clicking “Save”, you will see the screen that allows you to name your tree. The default is for trees to be public. I choose to keep my research trees private and then selectively update my public tree when I’m ready to call a conclusion solid. If you prefer to keep the tree private, uncheck the box that reads, “Allow others to view this tree…” before clicking “Save”:

Because Bill is an adoptee, I also made his tree unsearchable. To do that, click on the tree name just below the Ancestry logo:

Choose “Tree Settings”:

Then click on “Privacy Settings”:

Scroll down…

Scroll some more and check the box, “Also prevent your tree from being found in searches.”:

The privacy settings you choose are a personal decision. A lot of users get upset by private trees. If you have a reason you want your tree to be private – that is okay. If you are unsure of how you feel, I would suggest you start out with a private tree and then ask a few trusted friends/fellow genealogists how they feel about private/public trees and consider their reasons. You can always turn a private tree public, but you can’t pull data back once someone else has saved it to their own tree. When you want to use a tree like I did for Bill, and play with it to test a theory, that type of tree is best kept private so other researchers don’t get confused or led astray by our work in progress.
Step Two – Add Your First Match
There are a few ways you can do this. I chose to do it this way. From the tree view, I clicked on “Add Father”:

I am adding my first DNA match to my new tree as my Father, I will fix that IMMEDIATELY after I add the match to my tree.
(All names and other info are made up, except for the relationships, cMs, and segment data – I used actual DNA matches of mine for those numbers. In my original post I focused on the story of helping my friend, but for my examples here, I am using myself.)
The match goes in with three asterisks *** followed by his username.
Why three asterisks? When you want to search your tree for a person, you need to type three characters before Ancestry starts to auto-populate a list for you. I want to be able to type *** and see my whole list of DNA matches that are in my Master Match Tree.
If the username is something less descriptive than Isaac Glass, like initials or a combo of things like mk123, I type the username immediately after the asterisks. If I later learn the name of the match, I go in and add the data in the appropriate boxes without removing the asterisks or the username. So mk123 might eventually look like this:
First and Middle Name – ***mk123 Mike
Last Name – Klein
I add the predicted relationship range into the suffix field:

Isaac Glass now shows as my father. I need to fix that NOW! Navigate to Isaac’s profile:

Once on the profile, click on “Edit Relationships” on the Edit tab:

Isaac has only one relationship at the moment – I am going to click on the x and remove myself as his child:

Ancestry will ask if I’m sure. I am, so I click on the green “Remove” button:

After clicking on remove, I land back on Isaac’s profile page:

Next, I add a custom event:

For the fact label, I name it “Shared cMs” or “Shared cMs to Mom”, etc. I plug in the actual year in the date field, and then in the description, I add the number of shared cMs and number of segments:

The custom event looks like this when I am done, nice and easy to see:

In my tree for Bill, I was only working with his data. In the tree I created for myself to process the DNA matches on my great-grandfather, John Costello’s line, I manage four DNA accounts that are descendants of John, so I add the cM and segment data for each of us as a custom fact.
Once I’ve added all of the custom facts that are relevant, I move on to adding the tree found in the account of the DNA match. I modeled Isaac from an actual match of mine, that match has a tree with only four people, similar to this:

My actual match had a few dates and places for his paternal grandparents. Using that information as clues, I did a lot of record searching and was able to build out his tree to look similar to this:

Once I got about that far, I moved on to my next DNA match.
Step Three – Add Your Second Match
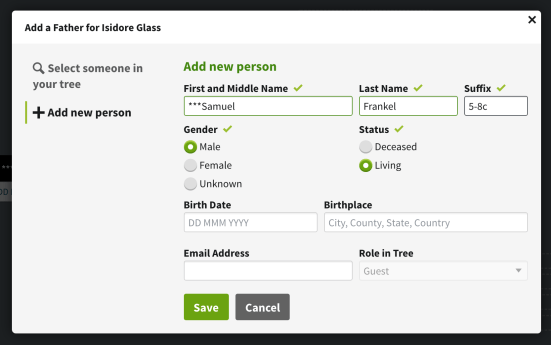
While still looking at Isaac’s pedigree, I clicked on the “Add Father” button for Isidore Glass and saw this screen:

I was adding my next DNA match so I started off with three asterisks followed by his username and then I put Ancestry’s predicted cousin range for the match and myself (since I am the home person) in the Suffix field:
After choosing “Save”, Ancestry popped me back to the tree view for Isaac. IMMEDIATELY, I want to edit Samuel’s relationships and detach him from Isidore. I do that by first navigating to Samuel’s profile from the tree view:

Once on Samuel’s profile, I go to “Edit Relationships”:

There is currently only one relationship in the tree for Samuel – Isidore Glass is listed as his child, I click on the big blue “X” to remove Isidore:

After disconnecting Samuel from Isidore, Ancestry will pop me right back to Samuel’s profile page where I will add custom events listing the number of shared cMs and segments. I went ahead and entered this data for myself, my Mom, her brother – “Uncle C”, and their 1st cousin – “Cousin M” so you can see how interesting the differences are:

Next, I added the data from Samuel’s tree and it looked similar to this:

Using historical records, obituaries, and living people finders, I worked on Samuel’s tree until it looked more like this:

Step Four – Obituary Linking
This step is where magical things happen. We’ve now got three separate branches in our tree. I am the home person. I have entered two DNA matches so far. I can navigate back to those DNA matches in my tree by simply clicking on the “Find Person” icon either from the tree or from a profile page and then entering three asterisks:


Both of my DNA matches show up in that list and are easy to find.
Now back to the obituaries.
I took the actual obituary that linked the actual men I am representing in my two example matches and changed all of the names in the obit, just like I did with the trees. Here is our example obituary for Rachael Platt (Please note that she had many more family members listed, I only included the people already in this example, the additional relationships were very helpful in my actual research.):

I already have Rachael’s husband Solomon Pilchen in the tree, as well as her daughter Celia and Celia’s husband Sam, and of course, Isaac Glass who is one of my DNA matches. So I upload the image of the obituary to Rachael’s gallery:

I want to attach this obituary to every family member that is listed. Here I am adding Rachael’s husband Solomon:

Once I add Solomon, Celia, Samuel, and Isaac and hit save, my media item looks like this with tags to Rachael, Solomon, Celia, Sam, and Isaac over on the right:

I have one more very important relationship in this obituary I need to work on. Rachael has a “dearest sister” named Esther Haspel. But currently in my tree, Rachael’s parents only have one daughter – Rachael:

Next, I did some research in historical records and found the family of Rubin Platt and Hava Lerner in a grouping of records. They had three daughters including Rachael, Esther, and one sister who died as a child. There was a messy path of records for Esther that included a few marriages. Once I had her figured out, I found her obituary. Here is an example obituary for Esther (Just like with Rachael, please note that she had many more family members listed, I only included the people already in this example, the additional relationships were very helpful in my actual research.):

In attaching this obituary, my two DNA matches come together. When working with the trees of DNA matches you haven’t been able to connect to yourself yet, sometimes it is a challenge to keep everyone straight in your mind. That struggle is further intensified by the fact that you don’t know which line in their tree might matter to your brick wall research. If I had added these two DNA matches to my tree at very different times and hadn’t noticed the connections while reading the obit, when I attach the obit to each person, this is where I would see that. Here is the Esther I created with her parents and sisters:

I’ve got three of her husbands and one daughter. As I add the obituary, I attach it to each person mentioned in that obit like I did before. As I start typing her daughter Lena’s name, I see that I have two Lena Mullers in my tree:

One Lena Muller is here, as the paternal grandmother of Samuel, my DNA match:

And one Lena Muller is here as the granddaughter of Rubin Platt and Hava Lerner in the tree of my other DNA match, Isaac:

In the actual tree, there are dates, places, records, and additional people to look at. By comparing the data of both women, I can see that both Lenas are actually the same woman. Now it’s time for some CAREFUL merging and cleaning up.
I also need to go back to Esther’s obituary and add the rest of the people mentioned in that obit and tag the obit to them. Tagging serves two specific purposes – first, it helps us see if we have two people who might be the same person in different parts of the tree, like with Lena; second, it is our proof of the relationship between the deceased and that family member. In fact, it may be our only proof of the existence of that person for a while. If we add someone to the tree from an obit and all we have is “Jack” and the fact that they are a son-in-law to the deceased, if we come back to Jack at a later time and wonder how we know his first name, having the obit in his gallery will help us refresh our memories and see our proof of Jack’s place in our tree.
Step Five – We Have a MRCA Couple!!
Once I cleaned everything up, I was able to see how Isaac Glass and Samuel Frankel were related to each other. Their MRCA couple (most recent common ancestor) are Rubin Platt and Hava Lerner. Isaac and Samuel are one generation apart. Isaac is the great-grandson of Rubin and Hava:

And Samuel is the great-great-grandson of Rubin and Hava:

Isaac and Samuel are 2nd cousins once removed – or 2C1R.
I’ve just brought together two distinct branches in my Master Match Tree. They were created based on the trees of my DNA matches, and then further developed through my own research. Once their MRCA couple was identified, and duplicates were merged together, Isaac and Samuel are now two DNA matches who are part of ONE branch of my Master Match Tree.
It’s important here to note that Isaac and Samuel each had only one branch in their trees. Isaac had a small portion of his paternal line and Samuel had a portion of his maternal line. Isaac and Samuel matched on the branches of their trees that WERE EMPTY. Without my own research on their lines, I would not have found their connection by simply looking at their trees.
I used this same set of steps when building Bill’s Master Match Tree. Each obituary is the magic key that can help link those loose branches together. Not every obit for every person will be detailed enough to bring branches together, so we need to look for obits for everyone in each branch.
In some cases, our branches come together through historical records. But in my own research experience, most often I bring branches together based on an obituary. Why? Most of my DNA matches are living. Connecting living people is most often done through obituaries and living people databases.
Conclusion
A Master Match Tree is ONE TREE on Ancestry.com that represents multiple DNA matches. Those matches are entered into the tree as separate branches and then slowly brought together through our own research in historical records, obituaries, and living people databases. This method can help adoptees identify their birth parents, or help genealogists solve brick walls.
In this example today, I modeled my examples from two actual DNA matches that my family and I share. The really exciting part is that the MRCA couple in my example, Rubin Platt and Hava Lerner, ALSO represent an actual MRCA couple (with different names of course) for two of my DNA matches. That discovery propelled me forward and led me to additional DNA matches connected to the real DNA matches. I have so much to share about the real discoveries and how they are helping move me along the path toward smashing the John Costello brick wall. I CAN’T WAIT!!
Happy Friday, I hope it’s a genealogy-discovery-filled weekend for you! I’m off to SLIG Academy next week – hooray! xoxo