


If you know me at all, then you know that I have been blessed with an abundance of ancestral photos. Seriously, an abundance. Like coming-out-of-my-ears-I-will-never-finish-scanning-in-my-lifetime kind of abundance.
This is both wonderful and challenging. The wonderful definitely outweighs the challenging – definitely! But we need to be careful not to underestimate the time, effort, expense, and organization required of those who work to digitize & share family photo collections. It is so much work. But those of us who do it, do it out of love, and we want to share!
Recently, one of my sisters sent me this text message:
If I want to print some pictures of ancestors would I just download them from the Facebook groups you’ve created? Will that give me the best quality?
What fantastic questions!
First of all – hooray! that my sister is noticing the photos I’m sharing on Facebook, that’s why I do it. Second of all – hooray! that she wants to display some of those precious photos in her home where her children will see them all of the time. Third of all – hooray! that I was already all set and didn’t have to slow her project down by finding a way to share the images with her. We were able to text back and forth a few times with simple instructions and answers to questions that easily led her to the highest quality version of the photos she was interested in.
This experience caused me to decide to share my process for dealing with photos right here. I take several steps with each photo. Each step has a very specific purpose for sharing, preservation/back-up, or both. I hope my method will inspire you as you consider how you digitize, preserve, back-up, and share your treasures. Remember, there is no perfect or “right” way. We all have to find what works best for us.
My process for handling a photo includes the following steps:
- Scan
- Edit
- Upload to multiple places:
- WordPress, if I’m including it in a blog post
- FamilySearch
- My Ancestry Tree
- Flickr
- Costco Photo Center
- Back-up
- Delete from laptop
- Preservation of the original physical photo
Scan
There are so many options for scanning. After many years of preserving photos in different ways, I have finally settled into a groove when it comes to scanning. I use three different scanning methods depending on the circumstances.
At-home scanning of items in my possession is all done on my Epson Perfection V600 Photo Flatbed Scanner. This is my preferred method because it yields the highest quality images.
A few simple scanning tips for this scanning method:
- Make sure the scanner glass is clean.
- Gently clean the photo with a clean, very soft cloth or brush – don’t blow on the photo, you never know when you might have a wee bit of saliva end up on your image. Yikes!
- Scan at 600 dpi, or higher, as a TIFF file. 300 dpi will create a replica, size wise, so base the dpi on what you plan to do with the image. If you want the ability to print a 5×7 or 8×10 and the original photo is a 2×3 – scan at a higher dpi. 600 is my baseline. For very small, rare, or special images I will go up to 1200 dpi. Every once in a blue moon there will be a very rare, very small, AND very special photo and I will scan it at 2400 dpi. But like I said, that is very rare.
- TIFF files are lossless and can be saved as a jpeg for other purposes, but the TIFF file will become your digital negative. Jpegs are lossy files and not the best format for photo preservation. While TIFF files are much larger, digital storage has become much cheaper, so buy a few flash drives and scan those photos as TIFF files! I would prefer to do it right and only do it once. One additional tip is that if you scan at a higher dpi as a TIFF and then do a ‘save as’ into a jpeg, the jpeg will look better than if you scan as a jpeg in the first place. Here is an example. I shared this photo last week. The photo on the left was originally a TIFF that I saved as a jpeg. The photo on the right is a file I scanned as a jpeg to start with at 300 dpi. Can you see the quality difference? Try opening them in their own windows and zoom in, then you can really see it. Of course, the biggest difference is when the photo is actually printed. Our backlit screens make up for a lot of quality loss that can’t be fixed in printing.


I have two other on-the-fly scanning methods I also use.
1 – I have a ShotBox and DSLR camera that I take with me when I visit a relative. That way I can capture images and treasures in the moment without having to “borrow” them or wait for a relative to scan and share when they have time.
2 – I use the Google PhotoScan app for items too large to fit in my ShotBox. I suggest everyone have this on their phone. Be sure to practice a bit before you visit a relative. While it’s easy to use, it definitely has some quirks.
Now about those all-in-one scan/print combo machines. If that is all you have access to, go for it. Scanned is better than not scanned. But the image quality is much poorer. Often there will be a library or Family History Center that has a flat-bed scanner you can use at little or no cost. I suggest you look into that option.
Here is an example of a photo scanned using an all-in-one, then the same photo scanned using my flatbed scanner.


Edit
I, admittedly, am a photo-editing snob. I like to remove as much distraction as possible from my images. Dust, scratches, stains – I like to get rid of those. I want to focus on the faces. For really special photos I will spend more time. For most photos, I focus on the biggest distracting elements and remove those, and I always clean up all faces. In the images above, the one on the right is not edited, the one on the left is.
My preferred photo-editing software is PhotoShop. I know it’s an expensive program and not accessible to most, but I had a family member work for Adobe and got a sweet, sweet deal. There are many other free, or low-cost editing software programs available. Find something you like and edit – or not – as much as you prefer.
Here is a sampling of some photos before and after editing:


Upload
This sounds like a very long step, but it’s really not. For starters, I open six windows with each website I will need.

If I am using the photo in a blog post, I start with that and upload the photo into WordPress.
Then I upload the photo to my Ancestry Tree, FamilySearch, Flickr, Costco Photo Center, and Facebook. It’s pretty fast to start the uploads in each one. For most photos, I just copy and paste the description into each website. Occasionally I tweak it based on the audience. See examples below.
Why upload the photos to so many places? Each serves a different purpose.
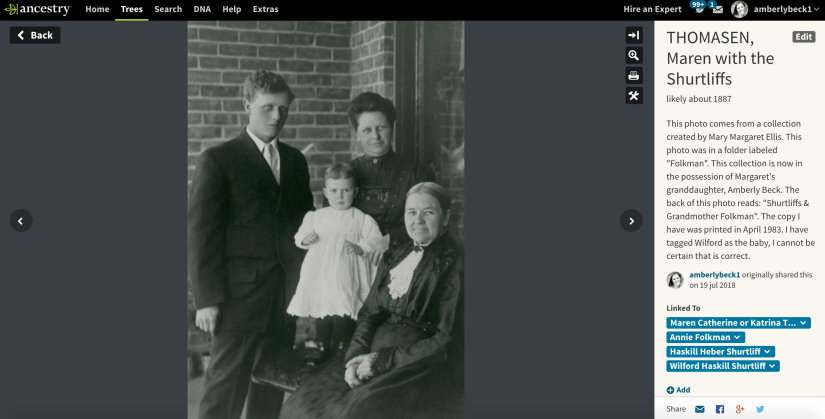
My Ancestry Tree is private, so this step is for me and the family members I have invited to view my tree. I like to have my photos there – simple as that. It also serves as cousin bait. Cousins will still see that the photos exist, even though they can’t see the images, and often send me a message. I always share and I have made some great discoveries because of these connections. I upload the smaller jpegs that I saved from my TIFF files. Ancestry has a 15MB limit.
FamilySearch is next. I add the photos to FamilySearch for four reasons. First, preservation. FamilySearch is really good at preservation and I know they will do their best to preserve those images in perpetuity. Second, I feel a sense of responsibility to share the family treasures that have made their way to me as widely as possible. It’s my way of showing gratitude for the abundance and trying to make the photos accessible to all of my relatives. Third, cousin bait. It’s great stuff that cousin bait. When a cousin sees that you have added a photo, they can message you right inside of FamilySearch. Great things can happen from those contacts. Fourth, this one may seem weird, but my little one likes to play the Little Family Tree app. Putting photos on FamilySearch means there is more cool stuff in his game experience. I also upload the smaller jpegs that I saved from my TIFF files here. FamilySearch also has a 15MB limit.


Next comes Flickr. It is a great, free, photo storage website. It has awesome privacy controls that can be set differently on each photo. You can make each image completely private, viewable by people you have designated as family or friends (two separate categories, cool!), or public. You can also make them searchable or not, within each of those categories. Flickr has great organizing tools in the form of albums and tags. Photos can be in more than one album. The description area for each photo allows for very lengthy text. You can comment on photos to add additional information or receive comments from family. Photos can be tagged. I like to tag people with their full name, no spaces, with capitals to make it legible, ie RonaldSkeenPeterson. Clicking on a tag will bring up every item with that same tag within Flickr. Albums can be collaborative so family members can work together. I love that Flickr allows large file sizes, up to 200MB. I upload the large TIFFS here. If the people in the photos are deceased, I make them publicly accessible (this is where I directed my sister to get large files), if not, I restrict them to family members. You can download the files at their original upload size. Awesome!


Then comes, Costco. I upload all of my photos to Costco Photo Center into albums. This way I can print photos anytime I need them without having to find them and upload them. My albums are chronological for my children, but by name for ancestors, ie Ronald & Margaret Peterson fam. I upload the TIFF files here as well. The file size limit is 95MB.

Lastly, I upload all photos to Facebook. I have different albums and they are set to be viewed only by my family members. This is a great way to give my non-genealogy family members little bits of our history. It’s also an easy way for them to “find” our old family photos in a simple, non-genealogy way. Plus, it’s that whole social aspect of social media. It gets family members thinking and talking about their ancestors.


Back-up
Once I have my photo everywhere that I want it, I move it onto an external drive.
Delete
After making my backup copy, I delete the files from my computer. Gotta keep that hard drive nice and clean.
Preservation of the Original
This step is really important. I’m still working on a long-term, one and done plan for this. My problem is volume. There are simply so many, many photos that it’s hard to physically store them all in the best way. But I’m working on it.
And that folks, is my method for digitizing, sharing, and preserving photos one image at a time. My focus now is to try to O.H.I.O. – only handle it once. Take a photo from start to finish and move on to the next. I know some people like the idea of “scanning everything” and just “getting it done”. My problem with this is that often the images sit somewhere and nothing else happens with them. There is also the added challenge of technology changing. My goal isn’t to “get it all done”. My goal is to do it right. I know that my method isn’t the fastest, but it works for me and my family.
So family members, if you want to find a nice sized original of a photo I have shared here on my blog or elsewhere, go to my Flickr account. The largest files are found there. Remember, if anyone in the photo is alive, it will be marked private and you won’t find it. You will need to request to follow me and then I can mark you as family.
Happy Monday, I hope it’s a great week filled with genealogy goodness! xoxo
Enjoyed reading your detailed instructions for scanning and saving…I have a Canon 8400 flatbed and a Flip-Pal and use them both extensively, like you do. Original photos are stored in archival-quality boxes with metal edges so I can stack them 4 high without crushing anything. Thanks for sharing your tips!
Thank you, Marian!
That is exactly where I am headed next – archival boxes. I have been trying to figure out how to do it safely, while still maximizing the space I have, and keeping the photos organized in an easy to use/find way. The thousands upon thousands surrounding me are causing the “planning” phase to take a looooong time. But, I’m getting closer. For now, I’m just trying to keep the “scanned and shared” photos separate from the “not yet scanned” photos. It’s such a great problem to have! <3
Great article. I have a similar problem – lots and lots of wonderful family photos!! Several years ago I spent a great deal of time scanning, editing, and labeling photos. I kind of burned myself out, to be honest. But reading your article with specific steps has motivated me to get back at it. Thanks for all the useful tips!!
You are welcome, Lark! I’m glad it motivated you. 🙂 I have found that having a goal of writing one “Photograph Showcase” post on my blog each week helps me do just a little bit at a time. It feels manageable for me. I also added my Ellis Album series sharing an awesome photo album created by my great grandmother this year. Those two series keep me chugging along, a little bit at a time. Good luck with your photo efforts! Every little bit is a blessing to all of your family members, near and far. <3
Thanks so much for this post Amberly. I don’t have nearly as many photos as you (so no excuse for not getting on and scanning them properly, right) and reading this has made the process seem more manageable — because I feel like i’ll Actually be doing it right. 😀
Oh! You are welcome, Su. I’m glad I inspired you a bit. Best of luck in your photo efforts. Let me know how it goes! <3
Thanks Amberly 🙂
What a fabulous post filled with excellent and practical advice! Thank you for all your insights and tips.
Thank you, Eilene! I’m glad you enjoyed it. 🙂
Awesome article, Amberly!
Like you and most of the other commenters, I have a load of ancestral photos that are currently in storage while we are doing home renos. Lots of good process tips here that I will be stealing! 😉
Thank you, Ian! Good luck with the home renos. 🙂
What an exciting post. I didn’t have time to read it all, but I will. I hope I understand the instructions & find the strength to stay with it. The heat, among other things, hasn’t helped my energy level one bit.
Thank you for sharing your knowledge! I so appreciate it & your timing was perfect, as I recently acquired family photos from the 1800s.
How wonderful!! Isn’t it such a delight to inherit photos? I hope you feel better soon and can get to work. <3
Great post, Amberly—now, if I only had some photos to scan. Well, actually I have thousands of photographs from the last 40 years or so…. Another day. One question: Aren’t you nervous about deleting the photos from your hard drive? I am so concerned about “cloud” services that I do in fact clog up my hard drive with all the scans of photos and documents.
Thank you, Amy!
Good question – There are a few that I don’t delete, favorites, ones that I don’t have a physical copy of, etc. Everything else is on at least one external drive, plus multiple cloud storage locations. It does make me a tad nervous, but I just don’t have the space on my harddrive to keep them all on there.
I am running out of space on my one year old laptop’s hard drive, but so far I don’t trust anything but the computer, silly as that is. Yes, everything is backed up on Carbonite, OneDrive, and (when I remember) an external hard drive, but still….
Haha! I can totally relate to feeling that way. I used to be the same. But I bogged down my last laptop to the point of it being unusable, so I’ve tried to find a better balance with my current laptop. I do still feel a serious twinge every time I delete a photo or record (that is backed up in multiple places). 😉
Mine is starting to do weird things. I think I will have to do the same. My stomach is churning as I say that though.
I understand. Maybe print physical copies first? Put them in a firesafe? Good luck. <3
Thank you. This was very interesting and extremely helpful.
You are welcome! I’m glad you found it helpful. 🙂